In the modern digital landscape, the act of immortalizing moments through photography has evolved into a habitual reflex for many. With the proliferation of smartphones, these devices have largely supplanted traditional cameras for everyday use. The boundary between professional-grade photography and mobile photography is becoming increasingly indistinct. While iPhones have garnered accolades for their superior camera quality and intuitive photo editing tools, Android aficionados need not feel sidelined. Equipped with the proper tools and techniques, it’s entirely possible to create stunning, iPhone-caliber photo edits on an Android device. This article will unravel that process, with a spotlight on vivid high-definition filters and cutting-edge editing applications to elevate your images.
Mastering the Fundamentals of Photo Editing
Before delving into the intricacies of specific tools and applications, it’s paramount to grasp the essentials of photo editing. A skillful edit amplifies the photo’s appeal by fine-tuning its color, brightness, contrast, and sharpness, rendering the image more captivating. Filters, in turn, layer on pre-defined hues and effects, offering a quick and artistic transformation. Although iPhones boast formidable built-in editing capabilities, Android offers an array of apps that rival—or even surpass—the functionality of Apple’s native tools.
Key Photo Editing Terminology
To harness the full potential of any editing application, it’s critical to familiarize yourself with several fundamental terms:
- Brightness: This adjusts the illumination level of your photo. Enhancing brightness can infuse an image with vividness, while reducing it introduces an atmospheric, moody quality.
- Contrast: Enhances the divergence between light and shadow in your photo. High contrast yields a more dramatic image, whereas lower contrast softens it.
- Saturation: Regulates the intensity of your colors. Elevated saturation results in more vibrant hues, while lowering it renders colors subdued and understated.
- Exposure: Refers to the quantity of light captured within the frame. Adjusting exposure can correct under- or over-lit images.
- Sharpness: Increases the clarity by emphasizing edges, lending the photo more intricate detail.
- White Balance: Ensures the color temperature is correct, making whites appear true and colors look natural.
Top-Tier Android Apps for iPhone-Like Photo Editing
Android’s Google Play Store boasts a multitude of robust photo editing applications that rival or outshine iPhone’s offerings. Below are some top contenders:
- Snapseed: Engineered by Google, Snapseed is a professional-grade, no-cost editor that encompasses a broad array of tools and filters. Advanced functions like selective adjustments, healing, and brush tools elevate the experience. The user-friendly interface caters to beginners while still offering enough complexity for seasoned editors.
- VSCO: Renowned for its exquisite, filmic filters that emulate the feel of classic film stock. With robust tools for adjusting exposure, contrast, and saturation, VSCO appeals to users aiming for an artistic or vintage aesthetic. Additionally, it has a community feature for sharing edits and drawing inspiration from others.
- Adobe Lightroom Mobile: A powerhouse for editing, available on both desktop and mobile, Lightroom offers a comprehensive suite of tools. With RAW photo editing, exposure control, and precise color adjustments, it’s ideal for users willing to invest time in perfecting their edits.
- PicsArt: Marrying photo editing with a social network, PicsArt enables users to edit with a variety of filters, add text, or create collages, while sharing their work within the app’s community.
- Prisma: Prisma stands apart with its artistic filters that transform images into masterpieces inspired by famous artists like Van Gogh. While lacking in traditional editing tools, its unique flair makes it a favorite for those desiring an avant-garde aesthetic.
Step-by-Step Guide to Replicating iPhone-Quality Edits on Android
Now that you’re acquainted with some powerful apps, let’s explore a step-by-step guide on achieving iPhone-like edits, using Snapseed as our model:
- Import Your Photo: Open Snapseed and import the desired photo by tapping the “Open” button.
- Tweak Fundamental Settings: Using the “Tune Image” tool, modify the brightness, contrast, and saturation to craft the perfect base. Start with brightness and exposure, then subtly enhance the contrast and saturation.
- Selective Adjustments: Snapseed’s selective tool allows for precision. If, for instance, the sky is too luminous, you can lower the brightness in that specific area, preserving the overall balance of the image.
- Healing Tool for Blemishes: The healing feature removes unwanted objects or flaws from your photo. With a simple tap, the app fills in the selected area using nearby pixels.
- Enhance Clarity: Access the “Details” tool to sharpen your image and fine-tune its structure, making the picture look crisper and more defined.
- Apply Filters: Finally, apply one of Snapseed’s filters to bestow a distinct mood or aesthetic to your image.
- Export in High Quality: After finalizing your edits, export the photo at the highest possible resolution to ensure it retains its quality across platforms.
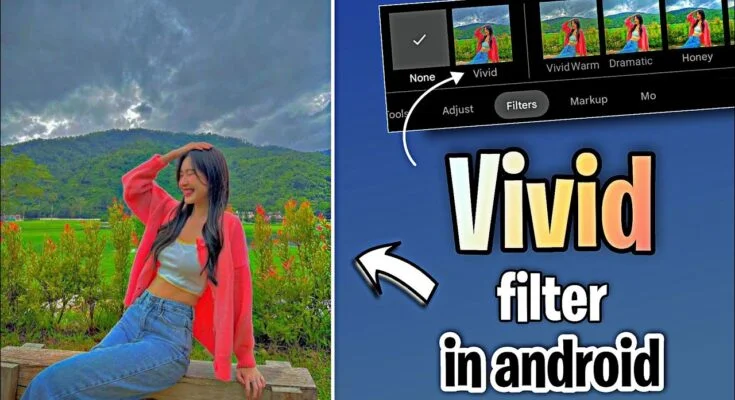
Mastering the Use of Vivid HD Filters
Filters can elevate an image dramatically. Android apps like Snapseed, VSCO, and Lightroom deliver a host of high-definition filters that can make your photos dazzle. Here’s how to maximize their potential:
- Choose the Right Filter: Not all filters suit every type of image. Some are better for landscapes, while others enhance portraits. Experiment to find the filter that best complements the photo without overwhelming it.
- Control the Filter’s Intensity: Most apps allow you to adjust how heavily a filter is applied. Starting strong and gradually dialing it back can help strike the perfect balance between enhanced and natural.
- Combine Filters: Some apps, like VSCO and Lightroom, offer the option to stack multiple filters for a unique, layered effect. Use this to add depth to your images.
- Consistency for Social Media: For platforms like Instagram, maintaining a consistent filter or aesthetic can create a visually cohesive profile, drawing in viewers with its uniformity.
Advanced Tips for Android Photo Editors
If you want to take your edits further, try these advanced techniques:
- Edit in RAW Format: Shooting and editing in RAW grants you greater flexibility in adjusting exposure, sharpness, and color, providing more control over the final image.
- Curves Tool for Precision: The curves feature, available in apps like Lightroom, allows for intricate tonal adjustments across shadows, midtones, and highlights.
- Manipulate Light and Shadow: Adjusting shadows and highlights can create dynamic depth in your images, bringing out hidden details.
- Dodge and Burn: Use dodging to lighten and burning to darken specific areas, creating nuanced depth and focus.
- Create Custom Presets: To streamline your workflow, save custom presets for filters or settings you use frequently, ensuring consistency and saving time.
Conclusion
Achieving photo edits that rival iPhone quality on an Android device is not only feasible but also immensely rewarding. With a firm grasp on photo editing basics, access to powerful apps, and mastery of advanced techniques, you can transform your images into breathtaking visuals. Whether for personal fulfillment, social media branding, or professional work, Android equips you with a plethora of tools to accomplish high-definition, vivid results. So, download your preferred app and begin crafting extraordinary photos today!